Imagine paying someone to create a roadside billboard for your business. They’re a top-tier designer, and they could help your products reach a huge audience. There’s just one problem: they don’t have the right information about your product.
The Google Shopping feed is powered by the Google Merchant Center, enabling limitless digital “billboards” all around the world. But, just like the unfortunate billboard designer in the above example, your Google Shopping feed can only do a great job if it has the right product data.
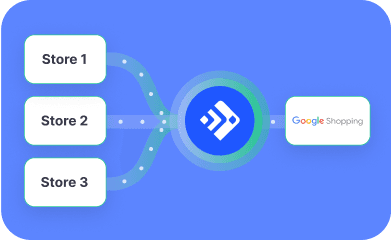
A structured file or API connection, the Google Shopping feed sends product data to the Google Merchant Center. From there, it can power ads, listings, and more, provided every title, price, image, and availability value is accurate. This is why it’s critical you practice proper product data feed management, and more importantly, that you understand this particular feed in full.
Read on to learn what the Google Shopping feed is in greater depth, how to power more effective Google Shopping campaigns, and more.
What is a Google Shopping feed?
Simply put: A Google Shopping feed is the product data you submit to Google Merchant Center via API connection or structured file, so your products can appear in Shopping ads, Performance Max, free listings, and AI shopping surfaces like AI Mode and Gemini.
The Google Shopping feed is specific to Google, with attributes, accepted values, and policies all coming from Google’s own product data specifications.
If you’re new to this space entirely, be sure to read our in-depth guide on product feed basics.
Google Shopping feed vs. Merchant Center data source: same thing, new name.
Both the Google Shopping feed and the Google Merchant Center data source refer to the same thing: product feeds. Within Merchant Center Next, Google has rebranded “feeds” to “data sources,” further muddying the waters for those out of the loop.
In other words: The two terms are synonymous, with “data sources” being more modern and what you’ll find underneath your Settings in the Merchant Center.
What a feed contains: identifiers, descriptive attributes, price and availability, shipping and tax.
Your Google Shopping feed powers a lot, so naturally there’s a whole bunch that goes inside it. Like a digital, brand-focused cake that lives inside your Google Merchant Center account.
Before you can start focusing on conversion rates and advertising dominance, there are dozens of product attributes to note, broken into four practical groups below:
Identifiers: Tell Google which product the data maps to, using elements like id and Global Trade Item Number (gtin)
Descriptive attributes: Tell shoppers what the product is using title, description, google_product_category, color, and size
Price and availability: Informs Google of the product price and availability, and must match the related landing/product page using tags like price, sale_price, and availability
Shipping and tax: Define what the shopper pays, through shipping and its sub-attributes, plus tax or account-level settings
Again, there are dozens of total attributes to focus on. Keep them broken up using the above categories to manage them more easily.
Where your Google Shopping feed serves: Shopping ads, Performance Max, free listings, and AI Mode
All those attributes and data mentioned a moment ago power a lot in your Google Shopping feed, which serves four surfaces:
Shopping ads: Showcase product visuals, names, price, and your store name on search results, partner sites, and more.
Performance Max: Special campaigns that push your feed and products across Google’s channels, including Search, Shopping, YouTube, Display, and more.
Free listings: Gain exposure with organic product listings throughout the Google Shopping area via the Google Merchant Center.
AI Mode and Gemini: Surface your products in Gemini and Google AI Mode carousels, AI agent checkouts for select merchants via Early Access, and more.
Ultimately, your feed decides if a product is eligible for any of the above.
Be sure to read our guide on product listing ads for a better understanding of everything going on in your Google Ads account and to better utilize your budget.
How to create and submit a Google Merchant Center feed
While there are numerous pieces of data that go into making an effective Google Merchant Center feed, the submission process is pleasantly simple.
Submitting a Google Merchant Center feed takes four steps:
Choose a data source method: file upload, scheduled fetch, Google Sheets, platform sync, or the Merchant API.
Map required attributes before the first upload.
Submit, then read the Needs attention report.
Set a refresh cadence that matches your price and stock volatility.
And that’s it! Now, let’s take a closer look at each step.
Choose a data source method.
First, you need to choose a data source method. You have a few options, each one better suited for different use cases. No matter, start by going to Merchant Center Next, Settings, Data sources, and then Add product source.
Next, you need to pick the data source method that suits your situation:
File upload: For small, stable catalogs updated by hand
Google Sheets: For small, stable catalogs
Scheduled fetch: For catalogs that change daily or near real-time
Merchant API: For catalogs that change daily
Platform sync: Baseline coverage for most typical merchants
If you have an edge case, like a particularly large or complex catalog, there are third-party apps and feed platforms that can provide fuller coverage than the above options.
Note: For those choosing the API route, Google sunset the Content API for Shopping on August 18, 2026. If you’re already using an API for feeds, see our guide on merchant API migration to ensure you’re safe from HTTP 410 errors and incomplete feed coverage.
Map required attributes before the first upload.
Next, you need to make sure data sources map properly to Google’s attribute names. Failure to do this will result in missing data or errors and hinder feed and Google Shopping performance.
If you’re manually doing this, check each product column and check the following attributes, as they’re the most common sticking points:
Mapping errors are one of the most common causes of first-time feed upload issues, so check the above carefully.
Submit, then read the Needs attention report.
The needs attention report will tell you which products have issues within your feed, with summaries for three issues having the biggest effect on your account performance.
You can find this report inside the Google Merchant Center by going to your Products page and then clicking Needs attention. From there, prioritize the issues impacting the largest number of products. It’s not uncommon for a single mapping mistake to cause thousands of errors.
Set a refresh cadence that matches price and stock volatility.
Your Google Merchant feed refreshes or updates at whatever cadence you choose. Typically, you want it to update at least once each day. If you have prices or stock that changes frequently throughout the day, have it refresh more often.
BUT, keep in mind: Google checks the price and availability against your landing pages or product pages. So, if you have your feed refreshing throughout the day, make sure your product pages match.
Google Shopping feed specification: required, conditional, and 2026 changes
As mentioned earlier, Google has specific, err, specifications. The Google Shopping feed specifications define every attribute Merchant Center accepts, those required, and values that pass validation.
In other words, it’s really important. Like everything else feed-related, tackle it each one of these sections at a time.
Core required attributes to map for every product.
Ten attributes carry most of the weight inside the Google Shopping feed, each of them deserving your utmost care and attention.
Attribute | What it is | Common error |
id | Your unique product identifier; must stay stable | Changed ids create “new” products; duplicates overwrite each other |
title | The product name shoppers see, up to 150 characters | Promotional text or all caps triggers policy disapprovals |
description | Product details, up to 5,000 characters | Missing or boilerplate text; promotional language |
link | The product landing page URL | Page not found, redirects, or wrong product |
image_link | The main product image URL | Image too small (500×500 from January 31, 2027); promotional overlays |
availability | in_stock, out_of_stock, preorder, or backorder | Value doesn’t match the landing page |
price | Price with currency, for example 24.99 USD | Doesn’t match the landing page or checkout |
brand | The product’s brand name | Missing, or store name used instead of manufacturer |
gtin / mpn | Global Trade Item Number, or Manufacturer Part Number when no GTIN exists | Invalid, reused, or missing; identifier_exists set incorrectly |
condition |
Conditional attributes: apparel, variants, and identifiers.
Conditional attributes aren’t required in every case, hence the name. But, for certain products, countries, and product conditions (new, refurbished, etc.) these attributes are a must.
Some conditional attributes include:
GTIN, MPN, identifier_exists: Required for items with assigned GTIN or barcodes. Those without need to set “identifier_exists” to no.
Brand: A must for most products, except those hand- or custom-made, or generic and unbranded goods.
Variants: item_group_id groups the size and color variants of one product; each variant shares the value and carries its own distinguishing attributes (size, color, material).
Condition: Not required for new products, but a must if something is used, refurbished, and so on.
Industry/product specific: Other products, like apparel in the US or UK, require elements like color, size, gender, age_group, etc.
When in doubt, refer to the Google Merchant feed specifications.
What changed in the 2026 specification update.
Throughout 2026, Google has had a series of three specification updates spread across key dates, each one changing something else:
April 14, 2026: New shipping sub-attributes handling_cutoff_time and minimum_order_value, plus loyalty_program_label and loyalty_tier_label sub-attributes, and a new optional video_link attribute.
June 30, 2026: Videos submitted through video_link became eligible to serve, with policy and quality validation.
January 31, 2027: The minimum resolution for image_link and additional_image_link rises to 500×500 pixels.
Google made an additional announcement on April 28, 2026, that from September 30, 2026, pickup_cost and minimum_order_value are required for in-store products enabled for pickup in the UK, Switzerland, and the EEA, if your site applies pickup costs or minimum order values.
For the rest, see our guide to Merchant Center product data specs.
Google product category and product type
You’d be forgiven for thinking a product category and product type were both related, and both something you set. In reality, the Google product category comes from Google’s taxonomy, while product_type comes from your own.
Look at Google’s published taxonomy for the google_product_category that fits your products the best. Then, submit a numeric ID. If you don’t, Google automatically assigns one, and may not choose the best fit.
The product_type is your own breadcrumb, like “Footwear > Women’s > Trail Running.” Google will treat this as a signal in the feed, not a hard and fast rule.
If you have “not matching” policy issues in your Needs attention report, these often stem from having the wrong Google product category. If you’re running into this, be sure to read our Google Shopping category taxonomy guide to make sure your product groups are in tip top shape.
Google Shopping feed optimization: titles, descriptions, images, identifiers, and custom labels
Google Shopping feed optimization means improving the attributes Google uses to match, display, and rank your products. Feed quality is the input Shopping and Performance Max campaigns run on, so it's the part of performance you control directly.
Go through the following to optimize your feed.
Optimize product titles for query matching.
With the right data, Google will match someone’s query with your product titles only when they’re truly the right fit. This is what you want, as every ad click costs you, so you want them to count. Make sure this is the case by optimizing product titles for queries.
Front-load the attributes shoppers type. A reliable formula is:
Brand + Product type + Key attributes + Size/Color
This formula works because many placements truncate longer titles. To exemplify this, here’s how this looks applied to an illustrative brand:
Before: Trail Shoe - Women’s
After: Northpeak Ridge 2 Women’s Trail Running Shoe, Waterproof, Size 8, Black
Keep titles free of promotional text and all caps, as both are policy issues. For category-specific formulas, see our guide to Google Shopping product titles.
Write descriptions that AI surfaces can parse.
It’s important AI can parse and surface the right information. Make this happen by putting the most important facts in the first 160 characters, in plain sentences.
AI Mode and Gemini read “waterproof upper, 4 mm lug outsole, 290 g per shoe” more reliably than marketing copy. Leave out promotional language and any claim that isn’t on the landing page, for good measure.
Meet image requirements before the 2027 500×500 minimum.
Replace any image smaller than 500×500 pixels first thing. Enforcement for this image requirement starts January 31, 2027, and Merchant Center has flagged affected products since April 14, 2026, giving you advance notice.
Fix identifiers: GTIN, MPN, and brand.
Remember a few of those conditional specifications from earlier? It’s time to address three of them: gtin, mpn, and brand.
Submit a valid gtin for every product that has one, as this is how Google matches your offer to its product catalog. Where no gtin exists, submit mpn and brand together. Reusing one GTIN across variants, submitting SKUs as GTINs, and putting your store name in brand are the identifier mistakes that trip merchants up the most.
Use custom labels to segment campaigns.
It’s generally a bad idea to lump all your products into a giant, monolithic Google ad campaign. Instead, segment things into various campaigns using custom labels so you can better monitor ad spend, performance, and so on.
Fill custom_label_0 through custom_label_4 with values your campaigns can act on: margin band, seasonality, price tier, sales velocity, or stock depth.
These are values shoppers never see, but exist to group your products into Standard Shopping lists and Performance Max asset groups. This will make it easier to segment efforts and better utilize your ad spend budget.
Audit cadence: what to check weekly, monthly, and quarterly.
As is the case with all things digital marketing and advertising, audits and regular performance checks are a must. And, as is often the case, you don’t want to audit everything all the time.
Instead of performing a blanket audit, split elements into the following audit cadences:
Weekly: Open Needs attention, clear new errors, and check for price and availability mismatches. These are quick fixes that can have a big impact.
Monthly: Review title and image quality for your top products by spend, and catch new SKUs with incomplete attributes.
Quarterly: Re-check category mapping, read Google’s specification and announcement pages, and confirm identifier coverage.
Anytime there’s a major Google specification update, you’ll want to double back and go through all the items in the above list, as well.
Supplemental data sources and attribute rules (formerly supplemental feeds and feed rules)
Supplemental data sources allow you to override product attributes with an additional file, while attribute rules alter how and where different attributes come from. Both are important to understand, as they can help you fix missing/wrong values.
Say a value is missing or wrong, the above give you three ways to address it:
Fix it at the source (your platform or PIM) when you can.
Use an attribute rule when the data exists but needs transforming, such as appending color to title.
Add a supplemental data source when you need to add or override attributes for specific products, matched on id.
Worth noting, both of the latter two options require the Advanced data source management add-on in Merchant Center Next.
When to edit the source, when to use an attribute rule, and when to add a supplemental source.
It’s best to start at the source whenever your platform lets you. This is the cleanest way to fix things and has the highest probability of success.
If the source is right but the format isn’t, an attribute rule is the next step. For instance, you could have an attribute rule that sets the title to brand + title.
Add a supplemental data source for values your primary source can’t provide, such as a margin band in custom_label_0 from a finance spreadsheet.
For more on this, our post on supplemental feed vs. editing product details in Merchant Center covers the trade-offs.
Attribute rules: what they can and cannot change.
Previously known as feed rules, attribute rules can be found in Merchant Center NExt under Settings, Data sources, then Product sources. From there, select a primary data source and open the Attributes rules tab.
Once you have this open, you can use attribute rules to:
Set to: Pull an attribute from a source column, static value, or combination
Extract: Pull part of a value out
Take latest: Take the most recently updated value across sources
As far as limitations, attribute rules can’t add or remove products, nor can they invent data. Also, note that they run in order, so it’s important to test them in draft mode first to see how the workflow logic plays out.
Supplemental data sources: matching on id and common mistakes.
Formerly known as a supplemental feed, a supplemental data source joins to your primary source on id. As a result, ids must match exactly, including case and prefixes.
A supplemental data source can override or add attributes, but can’t add or remove products.
When using a supplemental source, be wary of mismatched ids on account of an appended suffix, a supplemental source added as a primary source, and overrides that conflict with an attribute rule, as these are three common mistakes.
How to fix Google Merchant Center errors and product disapprovals
Google Merchant Center errors and product disapprovals are inevitable, so knowing how to fix them is a must. Fortunately, staying on top of them is feasible. But, keep in mind these issues will only compound the larger your catalog gets.
When fixing Google Merchant Center errors, you can follow the same four steps every time:
Open Products, then Needs attention, in Merchant Center Next.
Filter by issue type and sort by the number of affected products.
Fix the issue at the source, with an attribute rule, or through a supplemental data source.
Resubmit (or wait for the next scheduled fetch), then request a review where Google offers one.
Sounds simple enough, right? But wait, there’s more.
Where to find issues: the Needs attention report and its history view.
Circling back to the Needs attention report, it’s that section of the Merchant Center’s time to shine.
This is the one place to see every product, account, and data source issue. Each row shows the issue name, the affected item count, and a View fix action. Meanwhile, View history shows issues over time, which is how you spot a spike after a site migration.
If there’s an obvious issue, this is the place to find them. Like the discount bin full of banged up products, nothing in there is quite the way it should be.
Errors vs. warnings vs. notifications.
When looking through your Needs attention report, it’s crucial that you understand the differences between errors, warnings, and notifications.
The following differ in simple, yet major ways:
Errors stop a product from serving on the affected marketing method until fixed.
Warnings mean the product is serving but something is wrong or about to be enforced.
Notifications are informational.
Think of notifications as your eyes detecting a squad car on the side of the road, the warning as the lights flashing and a verbal, and the errors as the massive ticket you got for driving too fast.
The most common item-level disapprovals and how to fix each.
Item-level disapprovals are a lot like those that came from your parents when you were younger: never-ending. Fortunately, they’re equally easy to dismiss.
Issue (as shown in Needs attention) | Likely cause | Fix |
Invalid value [gtin] | Wrong length or check digit, or a SKU submitted as a GTIN | Submit the manufacturer’s GTIN, or remove it and use mpn plus brand |
Mismatched value (page crawl) [price] | Feed price differs from the landing page or checkout | Update the feed more often; use sale_price for promotions; check structured data |
Mismatched value (page crawl) [availability] | Feed says in_stock while the page shows sold out, or the reverse | Sync availability at least daily; align structured data |
Image too small [image_link] | Image below the minimum resolution (500×500 from January 31, 2027) | Replace with a larger original |
Promotional overlay on image [image_link] | Text, badges, or watermarks on the image | Submit a clean image; move offers to the promotions feed |
Missing shipping information [shipping] | No account-level shipping and no shipping attribute | Set shipping in account settings or add the shipping attribute |
Unavailable desktop landing page | 404, redirect to the home page, or a URL blocked to Googlebot | Fix the URL; allow Googlebot in robots.txt |
Missing value [description] | Attribute left empty in the source | Map the field; write missing descriptions |
|
Export your data to find the pattern.
Were your catalog to have only a handful of products, fixing errors would be a feasible, quick, simple manual task. But, you likely have hundreds or thousands. And when errors hit that many products, things get messy. Fast.
When an issue hits thousands of products, download your current feed data from Merchant Center and filter the export by brand, product type, or category. The pattern is usually one source, such as a supplier that never provides GTINs or a page template that hides price from the crawler.
Account suspensions and misrepresentation: what triggers them and how to respond
Where an item disapproval impacts only one product, an account suspension stops every product dead in its tracks. Naturally, you want to address an account suspension immediately.
In most cases, account suspensions stem from Google’s misrepresentation policy. When an item is misrepresented, you typically get a warning with either seven or 28 days to fix it. But, more egregious violations will result in suspension without a warning.
The most common account suspension triggers are:
Business information that’s missing or hard to verify, including an undisclosed shipping origin
A returns and refund policy that’s unclear or not honored
Price, availability, or fees that differ between feed, landing page, and checkout
Insufficient contact details
Listing items you can’t fulfill
This isn’t to say the above are the only violations, but if you get a warning, there’s a strong chance it ties to one of these.
Responding to account suspensions.
You can request a review from Google once you’ve addressed the violations. But, you want to make sure they’re fixed, first.
Before you request a review, run through this checklist:
Business name, address, and phone match across your site, Merchant Center, and Google Business Profile.
Returns, refund, shipping, and terms pages are live, linked in the footer, and consistent with Merchant Center’s return settings.
The contact page shows at least two working methods.
Price, availability, taxes, and shipping on a sample of products match the feed and checkout.
Shipping origin and delivery times on the site match what the feed promises.
Google says account reviews typically take seven business days, but they can take longer.
For a step-by-step look at the appeals process, be sure to read our guide to resolving a Merchant Center account suspension for misrepresentation.
Local inventory ads, regional availability and pricing, and free listings
Your Google Shopping feed powers a lot of exposure on its own. But, you can expand those efforts well beyond basic results and the shopping tab.
Google offers three programs that extend the same primary feed, each one needing something extra:
Local inventory ads: Need a local product inventory data source with id, store_code, availability, quantity, and price per store, and a linked Google Business Profile with matching store codes.
Regional availability and pricing: Needs a regional inventory data source with id and region_id, the price or availability that differs by region, and regions defined in Merchant Center.
Free listings: Need nothing new in the feed, but need the free listings marketing method enabled, policy compliance, and accurate availability and shipping.
The local inventory data source needed for the above sits under Product sources as a supplemental source. When addressing this, make sure ids match your primary feed and store codes match your Business Profile exactly. In the UK, Switzerland, and the EEA, in_store products enabled for pickup also need pickup_cost and minimum_order_value as of September 30, 2026.
When tackling regional availability and pricing, keep in mind that regional availability and pricing overrides national values in regions you define. Also, your landing pages must show the regional price when Google passes region_id.
For a deeper dive, see our guide to regional availability and pricing.
Lastly, free listings are the easiest to lose. Even a single availability value that lags your site is enough to lose a listing. You can boost your chances of success by reading our post on free listings on Google Shopping.
How your feed drives Performance Max and Standard Shopping campaigns
Performance Max campaigns are a powerful avenue, while Standard Shopping campaigns are a valuable action to keep in motion. Your feed drives both of them, but in different ways.
Both Performance Max and Standard Shopping campaigns read the same Merchant Center feed. This means any disapproved product is unavailable to both campaign types.
While a Standard Shopping campaign leaves most everything in your control, a Performance Max campaign automates nearly everything. This means your feed is the one thing you have full control over when utilizing a Performance Max Campaign:
Titles decide which queries you match with
Images and descriptions control how the listing looks
Categories control where your products are eligible
Meanwhile, a custom label in Google Merchant Center allows you to bridge the gap across both campaign types. For instance, in Standard Shopping, custom_label_0 value of “high-margin” can turn into a listing group you can bid on, while in Performance Max it turns into a listing group filter inside an asset group.
This is only scratching the surface. Get a clearer picture with our guides on complementing Performance Max with Standard Shopping campaigns and product listing ads.
Google AI Mode, Gemini, and UCP checkout: what your feed needs next
There was a time and a place when your feed was really only used for powering ad placement and exposure. But, with the advent of Google AI Mode, Gemini, and more recently, UCP checkout, your feed just got even more useful.
How AI Mode and Gemini use Merchant Center data.
Google AI Mode has officially surpassed one billion monthly users. That means every month, more than one billion people are potentially using AI Mode to pull queries from Google’s Shopping Graph, which holds more than 60 billion product listings as of October 2026. And your Merchant Center is the hub behind it all.
This is great news for merchants, but it does mean your product data has to be better than before. While a Shopping ad just needs a title, price, and image, an AI answer to “which of these is waterproof and less than 300 grams?” benefits from weight, material, and waterproofing claim as attributes.
Get a better idea of what this means for your business and how you can prepare with our piece on Google AI shopping.
UCP-powered checkout on Google (Early Access).
UCP-powered checkout on Google, in Early Access, is available to select merchants and allows shoppers to buy eligible listings in AI Mode or Gemini with Google Pay. And, you remain the seller of record.
UCP-powered checkout applies to products with eligibility in the US, Canada, and Australia, and only listings with the native_commerce (checkout_eligibility) attribute will show the Buy button. Participation also requires Google’s technical implementation and an interest form.
Google is also rolling out a UCP integration hub in the Merchant Center in the US, with Australia and Canada to follow next year.
The feature’s already being used by some big names, too: Nike, Sephora, Target, Ulta Beauty, Walmart, and Wayfair, to name a few.
What to do in your feed now.
This is all great, but how do you prep your feed for any of this? There are a few quick things you can do now:
Complete the descriptive attributes: material, size, color, product_detail, product_highlight, and a fact-based description.
Keep price and availability fresh with daily updates, at minimum.
If eligible, complete the UCP technical implementation, submit Google’s interest form, and add native_commerce to the listings you want checkout-eligible.
For further information, be sure to read up on how you can prep your feed for AI-driven discovery.
When to use a feed management platform for Google Shopping
A feed management platform can help you streamline most workflows within your feed, and make management more scalable, too. But, these typically come with a cost, which begs the question: Who needs a feed management platform for Google Shopping?
Whether you need a feed management platform comes down to four questions:
Catalog size: Can one person keep every attribute accurate by hand?
SKU churn: How often do products, prices, and stock change?
Channel count: Are you feeding Google alone, or Google plus marketplaces, social, and affiliate feeds?
Triage time: How many hours each week go into Needs attention?
Typically, ecommerce platform-native sync will cover the baseline for most merchant situations. But, apps and feed platforms can cover everything else, allowing transformation at scale, and more responsive error handling that doesn’t require manual report checking.
Feedonomics is a feed management platform that ingests your product data, transforms it to Google’s specification, and monitors Merchant Center for errors. With feed specialists who do the hands-on work with your team, you can even free up valuable time.
See if Feedonomics is right for you and start with our Google Shopping feed management page, or request a feed audit.
The final word
Your Google Shopping feed requires ongoing work, much like a garden. But, it’s worth the effort, as it can help you grow a marketable crop that sees your brand and products flourishing.
After a year of specification, API, and AI-surface changes, things may feel like they’re in a constant state of flux. Fear not, for there are three things you can do this week:
Open Needs attention and clear the three issue types with the highest item counts.
Audit titles, images, and identifiers against the April 14, 2026 specification and the January 31, 2027 500×500 image minimum.
If you’re eligible, complete the UCP technical implementation, submit the Early Access interest form, and add the native_commerce attribute.
Your feed efforts won’t stop, and your catalog will likely only grow in size. This means your feed efforts will scale right along with it. Making sure your feed is in the best spot possible, today, will only make your life easier in the long haul.
To start building a solid feed foundation today, request a feed audit from Feedonomics and discover what’s holding your feed performance back.
Google Shopping feed FAQs